
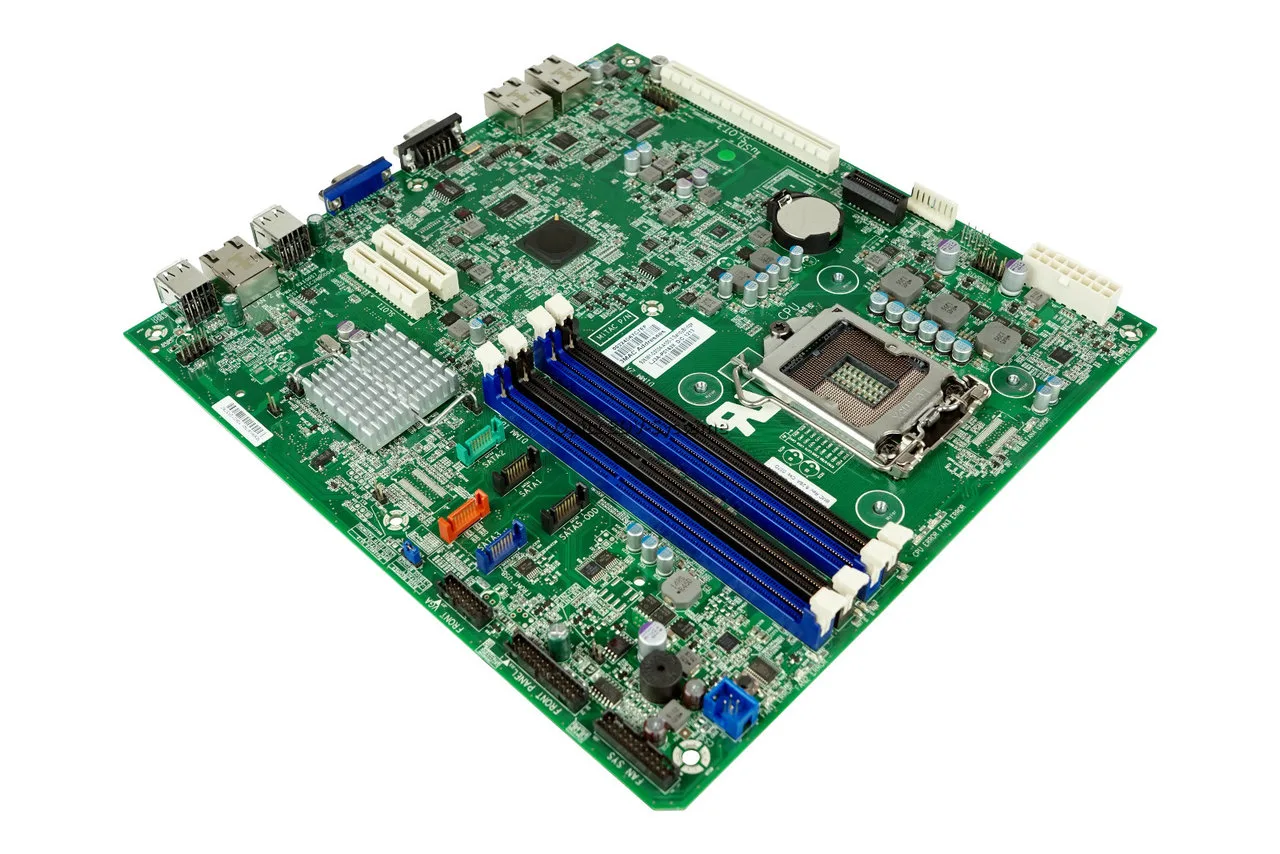
Motherboard Won’t Power On: Complete Diagnostic Guide
Your computer is dead silent. No fans, no lights, no beep, nothing on the screen. Before you assume the motherboard is finished and order a replacement, there’s a strict order of tests that separates a real motherboard failure from something far cheaper to fix. Most “dead motherboard” cases turn out to be the power supply, a short circuit against the case, or a battery that died three years ago and nobody noticed.
This guide walks through that test order exactly as a bench technician would run it, from the fastest checks to the ones that actually require opening the board up.
Step 1: Confirm the Power Supply Is Actually Delivering Power
Before touching the motherboard, rule out the PSU. This takes two minutes and eliminates the single most common cause of a “dead” build.
The paperclip test:
- Unplug the PSU from the wall.
- Disconnect the 24-pin connector from the motherboard.
- Locate the green wire (PS_ON) and any black wire (ground) on the 24-pin connector.
- Bridge the green wire and a black wire with a paperclip or jumper wire.
- Plug the PSU back into the wall.
ℹ️ Technical Note: If the PSU fan spins up immediately, the power supply is producing output at idle. This does not confirm the voltages are correct under load, but it rules out a completely dead unit.
If the fan doesn’t spin at all, stop here. The PSU is the problem, not the motherboard. Test with a known-good power supply before going any further.
If you have a multimeter:
Check voltages on the 24-pin connector while the paperclip bridge is in place:
| Wire color | Expected voltage | Acceptable range |
|---|---|---|
| Yellow | +12V | 11.4V – 12.6V |
| Red | +5V | 4.75V – 5.25V |
| Orange | +3.3V | 3.14V – 3.47V |
| Purple | +5VSB (standby) | 4.75V – 5.25V, always present |
If the purple wire shows nothing even before the paperclip test, the PSU has no standby power at all — this alone explains a completely dead board, because the motherboard can’t even initiate a power-on sequence without +5VSB.
Step 2: Rule Out a Short Circuit Against the Case
This is the failure that gets misdiagnosed as a dead motherboard more than any other. A single standoff (the little brass spacers that hold the board off the case) in the wrong position, or a screw touching a trace on the back of the board, will short the power rails and make the system look completely dead.
Do this:
- Remove the motherboard from the case entirely.
- Place it on a non-conductive surface — the anti-static bag it came in, or a piece of cardboard.
- Connect only the CPU, one stick of RAM, the CPU power connector, and the 24-pin connector.
- Short the power switch pins directly with a screwdriver (see Step 3) or use the paperclip method on the front panel header.
- Try to power on outside the case.
If the board powers on outside the case but not inside it, the problem is a case short. Check every standoff position against the motherboard’s actual mounting holes — an extra standoff under a spot with no mounting hole is the classic cause.
⚠️ WARNING: Never power on a motherboard resting directly on a metal surface, an anti-static bag’s conductive side, or a wooden desk without protection if there’s any moisture. Use a proper non-conductive test bench or the board’s original packaging insert.
Step 3: Test the Power Switch and Front Panel Connector
A failed case power button or a front panel connector plugged one pin off will produce the exact same symptom as a dead board: nothing happens when you press power.
- Disconnect the front panel POWER SW connector from the motherboard header.
- Using a flathead screwdriver, briefly touch both pins of the POWER SW header on the motherboard directly (not on the case wiring).
- If the system powers on, the case’s power button, its wiring, or a bent pin on the header was the actual fault.
Step 4: Reset the CMOS
A corrupted BIOS setting — often from a failed overclock, a bad BIOS update, or a dying CMOS battery — can prevent the board from powering on at all, not just from booting normally.
- Unplug the PSU from the wall completely.
- Locate the CMOS battery (a coin-cell battery, usually CR2032) on the motherboard.
- Remove it and wait 5 minutes.
- While the battery is out, press and hold the power button for 10 seconds to drain residual capacitor charge.
- Reinsert the battery and attempt to power on.
If there’s a dedicated CLR_CMOS jumper or button (common on higher-end boards), use that instead of removing the battery — it’s faster and less risky for the battery clip.
ℹ️ Technical Note: A motherboard that powers on for one second, then shuts off, then repeats in a loop is often stuck trying to boot with an invalid BIOS configuration. This is frequently solved by a CMOS reset alone, with zero hardware replacement needed.
Step 5: Strip the Build Down to the Bare Minimum
If the board still shows zero signs of life outside the case with a confirmed-good PSU, strip every non-essential component:
- Remove the GPU (if there’s onboard video, or test with just the CPU’s integrated graphics)
- Remove all RAM except one stick, tested in the primary slot (check the motherboard manual — it’s not always slot 1)
- Disconnect all drives, fans (except CPU fan), and peripherals
- Leave only: CPU, one RAM stick, CPU power connector, 24-pin connector
Attempt to power on. If the board now shows life — fans spin, a diagnostic LED lights up, or you get beep codes — reintroduce components one at a time until the failure returns. That component is your actual fault, not the motherboard.
Step 6: Read the Diagnostic LEDs or Debug Code Display
Most motherboards from the last decade have either:
- A set of four diagnostic LEDs labeled CPU, DRAM, VGA, BOOT
- A two-digit debug code display
- Motherboard beep codes through a case speaker (see our separate guide on decoding beep patterns)
If a diagnostic LED stays lit on CPU, suspect the CPU socket pins, CPU seating, or CPU itself. If it’s stuck on DRAM, the RAM or memory slots are the likely fault, and Step 5’s single-stick test becomes the priority. A board with no diagnostic LEDs at all and no beep, even after every step above, points toward the motherboard itself.
Step 7: Visual Inspection for Physical Damage
With the board still stripped down and outside the case, inspect closely:
- Capacitors: Look for bulging tops (should be flat, not domed) or any brown/white residue at the base — a clear sign of capacitor failure, common on boards over 6-7 years old or ones that ran hot for extended periods.
- VRM area (near the CPU socket): Discoloration, burn marks, or a burnt smell indicate voltage regulator module failure — this is a real motherboard fault, not something fixable by reseating components.
- CPU socket pins (on Intel LGA boards): Bent or missing pins from a poorly seated CPU will prevent power-on entirely.
- Traces on the underside: A scratch or scorch mark from a previous short circuit can permanently damage the board.
⚠️ WARNING: Bulging capacitors and burnt VRM components are not something to test around. If you find either, the motherboard needs replacement or professional-level component-level repair — continuing to power-cycle a board with damaged capacitors risks further damage to the CPU and RAM connected to it.
When It’s Actually the Motherboard
After working through Steps 1-7, you can be reasonably confident it’s the motherboard itself if:
- The PSU tested good independently (paperclip test, correct voltages)
- The board was tested completely outside the case, ruling out shorts
- CMOS was reset with no change
- The build was stripped to bare minimum with no change
- No diagnostic LED activity of any kind
- Visual inspection shows capacitor damage, VRM burn marks, or socket damage
At that point, check whether the board is still under warranty before buying a replacement — most manufacturers cover 2-3 years, and some extend further with registration. If it’s out of warranty and the damage is limited to a swollen capacitor with no VRM burning, component-level repair by a specialist can sometimes save the board for less than a replacement, though this is a judgment call based on the board’s age and value.
Quick Reference Checklist
- Paperclip test on PSU — fan spins?
- Multimeter check on 24-pin voltages
- Board tested completely outside the case
- Standoffs checked against actual mounting holes
- Power switch tested directly on the header
- CMOS battery removed and reset
- Stripped to CPU + 1 RAM stick + power only
- Diagnostic LEDs or debug code checked
- Visual inspection: capacitors, VRM, CPU socket pins
Working through this list in order takes 20-30 minutes and, in the majority of no-power cases, identifies a fault that costs nothing to fix — a bad standoff, a dead CMOS battery, a loose RAM stick — long before you need to consider the motherboard itself as the culprit.
✍️ Author: Bejenaru Alexandru Ionut – [email protected]

Recommendation: Looking for a professional bi-directional diagnostic tool with full system coverage? Use code DIAGNOZABAM for 10% off.
Transparency note: Affiliate link. Purchasing through it costs you nothing extra. View Thinkcar Deal →